Wednesday, November 13, 2013

Improving things


I finally got around to changing the tires to the proper size, no more nasty noises on bumps and lower rolling resistance as well. I made an appointment to get the alignment done on all four wheels, as it turns out, the alignment was out significantly.
I decided to upgrade the charger, as the existing charger was not putting out full power.
I found a charger on Ebay that will work, with the added benefit of providing ability to charge from public charge points with an added interface.
 
 
I have many projects left for this winter, I need to finish the rear box cover and reinstall the interior. The brakes need to be replaced in the rear, the dash finished and stereo install completed to name just a few.


Friday, October 4, 2013

Getting ready to roll, got the body cleaned up a bit. I will eventually get it repainted, but going to drive it for a bit first.

Wednesday, September 25, 2013

More testing

.

I have been driving and checking things out, I have a bunch of meters to keep me entertained.
The top is a amp hour meter and will show voltage and amps if needed.
The bottom set is one for each pack, front and rear.
The readings shown are after a 40 mile drive.
I still need to finish the dash, the meters have programmable outputs for control of external items and I plan on using some of them for lights and buzzers for low battery and range warnings.
I may use one to cut off the charger as well.

Saturday, September 21, 2013

First Drive

I modified the indicator for the warning light panel to use some of the indicators for the error lights and run indicators that come from the drive. While I had the soldering iron out I wired up the isolated DC/DC to the amp hour meter.
I pulled wires to the interior for indicators, meters and switches.
After a glitch with the programming of the watt hour meter, I got it reading correctly, I dropped the car off the stands and moved it under electric power for the first time but I only went 15 feet.


 I checked the brakes, as the car had not been on the road for a long time. The rotors were pretty rusty and I may have to address some sticky calipers. The front tires are rubbing the spring mounts and I added 5mm spacers for now, I will get the proper tires in the future.
I aired up the tires and install lugnuts, each wheel only had 3 when I purchased the car.

I decided to not complete the dash and give it a test drive, I found a few issues, the tachometer was acting a bit strange, I decided to remove a few reflectors and drop the pulse input to the controller per recommendation of controller instructions. I reprogrammed the controller and changed the ramp and rpm limit. 
The tach was still intermittent, I finally realized that driving with the hood off was causing improper reading from the optical tachometer pickup.
I have a few issues with the brakes, as well as the the speedometer cable is causing a fluctuation in speed.
I did a quick acceleration test and it will burn the tires and accelerate pretty well, I saw 700 amps at one point, but the batteries were not fully charged.
After the test drive I dressed the wires under the hood and secured things. I cut the acrylic sheet and drilled and mounted it over the front batteries.  The electric vehicle stickers were installed as well.
The hoses for the cooling are connected, but I haven't filled the system or connected the pump. During all the testing the controller barely got warm and the fans came on for a little bit.
 

Thursday, September 19, 2013

It Lives!

I wired up the low voltage and shortened the high voltage cables and hooked them up to the controller.
The controller set an error when power was applied, as expected. I hooked up the computer and after several attempts got the controller programmed and throttle calibrated. I started the controller and got power to the motor and checked the drive through the gears. The tachometer pickup could be better but I had a pretty steady reading.
I will need to adjust a few things after a test drive, which I hope to do this weekend after I install some meters to monitor the batteries.

Sunday, September 15, 2013

Controller install


I installed the new controller and started getting all the wiring started, a lot of changes due to the new controller.

Monday, September 9, 2013

Regrouping

Following many attempts to contact the manufacturer of the controller I have decided to go a different direction. I found a deal on a slightly used Solitron 1 and it is on the way. The controller solves a few issues, I have not been able to get an interface for the first controller in 5 months of trying that would allow programming and logging. Speed sensing and over speed shutdown is built into the Solitron as well as logging. The controller is 1000 amps and should be plenty for my setup.
I will need to revamp my mounting ideas as the new controller is quite large, 20 x 8, and I will have to move some things around.
 

Monday, September 2, 2013

Setbacks Happen

Things were going well on the long Labor day weekend, I was making progress on the wiring and battery install. It looked as though I was on track to drive to an EV meeting on Sept 7, but things don't always go according to plan. I fitted the batteries and was making the connections and running the high voltage wiring. The panic disconnect was wired and front pack installed as well as the fuses for the heater and DC/DC converter then I broke the jaw on the crimping tool, no big deal.
I decided to get a little charge on the batteries, the charger would not start, some type of error.
I thought I would run the motor on the full pack voltage, nothing! I had an error on the drive that would not clear and would not allow the drive to run. If I have it right, it looks like a throttle error. Both the controller and hall pedel were checked by netgain before I installed them, not good
I tried to boot the charger and find the error, the problem is it is DOS based, I tried a few computers, the emulator programs didn't allow communication.
I finally got an ancient IBM computer to access the charger and found a problem with the temperature sensor input, I jumped them with resistors as I had no sensors and the charger started, finally.


Sunday, August 25, 2013

Manual steering and battery install

I received the manual steering rack Fed Ex from Ebay on Friday, this was good timing for working on the weekend. I started by checking out my new steering rack, it was a bit rougher than expected, with a torn boot and a loose tie rod end.
I swapped out the boot and lubricated everything, I set the tie rod distance to match the other rack and checked the loose tie rod joint, no slop or wear so I will run it as is.
I made a shim for the mounting as it was smaller diameter than the power rack.
I will probably need to get an alignment at some point, I set the toe in with front to rear measurement.
I had to reposition the steering input shaft due to a difference in the racks. Not a direct replacement apparently.
Front batteries

Since I deleted the steering pump, I used the void to mount the coolant tank for the controller, I moved the pump as well and plumbed the radiator, pump, controller and tank.
I fabricated a mount for the 1000Amp shunt from 1/2in polypropylene to allow mounting.

I dropped all the batteries in the front box to test fit, I was thinking I could get another cell in for 51 total but not going to happen.


Rear battery box
I installed the side panels in the rear box. I made a clamping system with all thread and aluminum to hold all the batteries together.I set them on a layer of rubber and foam to allow for the mounting bolts and to cushion the batteries.
 

I received the circuit breakers I ordered to match some others I had from another project so I will be able to start the control circuit and 12v wiring

Saturday, August 17, 2013

Always something..

The seals for the banjo fittings came and I decided to install them and attempt to seal the power steering. I wanted to get this done before installing the batteries and all the other parts.
Murphy was looming in the garage and when I tightened the bolt it stripped the threads in the steering rack, crap... I looked at the donor car and the steering rack had damage so I would have to repair it as well as remove and swap with the other car.
I decided to go another way, I am going with a manual rack I found on ebay. This will eliminate the plumbing and the extra draw on the motor as well as reduce weight.

out with the old


 After the power steering issue, I went for stress relief and grabbed a sawzall! I attacked the rear package area with the saw to make room for the rear battery box. I removed the metal with surprising ease.


fitting frame
box in place  


I ended up with a big hole in the back of the car,
about 17.5 by 27. I built a top frame to fit the cutout, and then a box that will hang where the gas tank used to reside.


This is a shot of the frame, It is higher than the spare tire well and the differential, so it shouldn't get hit by anything.


test fit batteries
I put a few batteries in for fit, everything looks good, 30 batteries should fit without problems.
I made the box a bit deep, in case of different batteries later

Saturday, August 10, 2013

More under the hood work

I continued the work on the battery box and building the mountings for all the control equipment. I had a bit of a setback with the power steering, a leak has started and I need to get that sealed up. I tested the steering pump and steering and no leaks at that time.


The clearance is very close to the speed sensor and motor shaft by design, I need all the room to get the batteries in. I modified the sensor for motor speed sensor to work with the pulley for the power steering. I tested the speed sensor with the stock tachometer, everything woking as expected.
 

 The battery box was built oversize for upgrading the batteries later but I needed some room to mount the circuit breakers. I decided to mount the fuse and main contactor in the extra space as well.

Saturday, July 27, 2013

Progress mounting the parts

I have located the components and have almost finished the front battery box. The plastic covers arrived in the mail so I will be able to finish the boxes.
I received the 12 volt battery and fitted it in the tray. I plumbed up the vacuum system and secured the vacuum canister beneath the battery box.


I installed the radiator with fan setup in the front of the car behind the grill, it should get pretty good air. I found a location for the water pump that circulates the cooled antifreeze for the controller.

Sunday, July 21, 2013

Brackets and old car blues

I resumed working on the battery box and associated brackets, I welded the frame as much as possible and still install in engine bay. I will be bolting some parts in order to remove components that may need service later. I painted all the steel and installed in the engine compartment.
I mounted the vacuum switch, and tested the pump and vacuum system, I couldn't get much vacuum and traced to a leaking vacuum booster. I checked the donor car and found the booster in working condition, so after doing headstands under the dash of 2 cars I removed both. I cleaned up the working unit and installed it. A system check revealed everything working properly, I set the vacuum switch to cut off and about 20 and in at 15 inches of vacuum.


Saturday, July 20, 2013

A place for everything

 After a bit of thought I have decided on a configuration for the front battery box and places to mount the other items.
 
I had intended on using any factory bolt inserts to mount the angle iron for the boxes and found there really wasn't enough locations to secure everything. 
I used a motor mount location, the unibody frame rails that I will drill and bolt through with threaded rod. The front location is the bottom of the battery box, to the left of the motor there will be the 12v accessory battery with vacuum pump behind, just in place for location reference.

The top rack will be the resting place for the motor controller and DC/DC converter, and possibly the main contactor. I still need to find a location for the breakers and Vacuum switch, as well and the heater relay and various other control relays

Thursday, July 18, 2013

Power steering and motor mounting

I am reusing the power steering so I had to make a mount for the pump. I ordered a pulley for the motor that would give me a ratio that was close to stock, I probably could have under driven the pump to save power. The pump has electronic control of pressure that reacts to speed and road feedback so I wanted to keep it close on the ratios.
I started by cutting off about 2 pounds off the old bracket that mounted the bracket to the original motor and held the air conditioning pump.
The original bracket cut pretty easily even though some cuts were through 3/4 thick aluminum. I wanted to reuse the bracket to eliminate drilling and slotting for the pump and belt adjuster with the added rear mount for the pump.
 

I bolted it all together and this is what it looks like, the odd shape of the bracket was to use a piece of scrap 6061 aluminum, it ended up being very strong with little flex. I measured the distance around the pulley and picked up a belt at the hardware that fit well 

I went to the rear and marked it up for the battery box and where I will cut the package area to drop the battery box into the space where the fuel tank used to reside. I will be able to install 30 of the calb 100ah batteries in this space.

 I finally drilled the motor mount and secured the motor to the frame, while I was in the area I cut the radiator supports out to allow room for the rest of the batteries. It will be a tight fit, but I will be able to get another 20 batteries in the front between the motor and front frame. I thought putting the drive shaft in would be an easy reinstall, but I was very wrong! As it turns out the turbo car and non turbo use different front and rear flanges, they don't mix well. One drive shaft didn't fit the transmission, the other did but wouldn't bolt to the rear end. The best solution was to redrill the pinion flange to accept the driveshaft, not fun but will work.


Friday, July 12, 2013

Work has kept me busy but I have managed a few steps forward. I repaired some systems on the car, restored the blower high speed and got the wipers working properly as well as installing the parking brake, shifter bushings and shifter.
I cut down the bracket for the power steering pump to lighten and eliminate the mount for the AC unit.
I am still fabricating the mount for the pump and idler.
I have some time this weekend to finish making the mounts and installing the driveshaft and securing the front motor mount.

Sunday, June 30, 2013

I spent some time on Sunday getting the motor and transmission into the car. It took a little effort but I got the assembly under the car.
I still need to fabricate the front mount, but I feel I am making progress.


Saturday, June 29, 2013

Driveline build


The progress continues, I assembled the adapter and flywheel on the motor and took some measurements to see if the original "magic number" was close. The measurement was off a bit but I didn't torque the flywheel nut.
I built a lock bar to hold the flywheel and tighten the nut to 350 ftlbs. I tightened it all and checked the runout, I had to adjust a bit and still the runout was a little more than I liked but it spun up on 12 volts without vibration. A short trip to the hardware to get the bolts to put the pressure plate on the flywheel. I cleaned up the bell housing and the throwout bearing and sleeve. I lubed it all and put it together. I wrestled the motor and flywheel to join the motor to the transmission. A test with 12 volts showed all running well and the gears working well, I kept it short as no gear lube in the transmission. Next I get to drop the assembly into the car.


Sunday, June 23, 2013

Working on the little things

Not too much getting done this weekend, I worked with the transmission shifter and found the short throw shifter wont work for my application. I also checked the master and slave cylinders for the clutch, both are not usable in my opinion. I ordered both to replace the worn and locked up parts.

I put together the flywheel hub and flywheel. I built a bracket for the hall effect throttle and checked after install. I cut down the buss bar and drilled to install into my emergency disconnect.
I marked up the rear of the car for cutting out the area for rear battery assembly.

I mocked up a motor on the power steering for a separate power steering power source, the motor is not powerful enough, but did make the steering operate pretty well. I think the plan will be to drive the steering pump from the drive motor.


Friday, June 21, 2013

Flywheel fun

I received the flywheels I ordered on ebay, One aluminum and one steel with the counterweighted hub. I used a bandsaw and cut off the counterweight. I ground and cut with the lathe to remove the rest of the weight. The process took
a little longer than expected, the counterweight material dulled a lot of my cutting bits on the lathe.
The adapter from Canadian EV arrived, it looks well made. I tried the adapter hub on the motor, looks like a good fit. Now that the hub is done, I just need to assemble everything after getting some locktight for all the fasteners.
Hub on the lathe.. 
 Lots of parts to make it work, adapter, hub, flywheel, clutch, adapter plate. Hopefully I can keep the rounout and balance all good on the assembly.
 

Saturday, June 15, 2013

Details

I received some parts from ebay and picked up some more
extra parts locally. Not really progress but you need the pieces
for the puzzle.
I got the flywheel after much drama from a seller and am waiting
on the hub that is to be machined down to remove the counter weight
I will do that on the lathe as it is a simple job.
The adapter from Canadian Electric should be here soon, when it arrives
and I have machined the parts, I will bolt the adapter to themotor and check for runout and vibration before coupling the transmission. I plan on putting it together and installing as a unit.

Once that is set in the car, I can build the battery boxes and
mounts for the power steering and additional items like
vacuum tank, pump and switch.

Wednesday, June 12, 2013

So it begins


The project begins, converting a 1986 mazda RX-7 to electric. Goal is fun to drive and keep it light for performance.The motor will be from another unfinished project a Warp 9, 9" dc series wound motor.
I have chosen a Warp drive controller, 160 volt at 1200 amps.
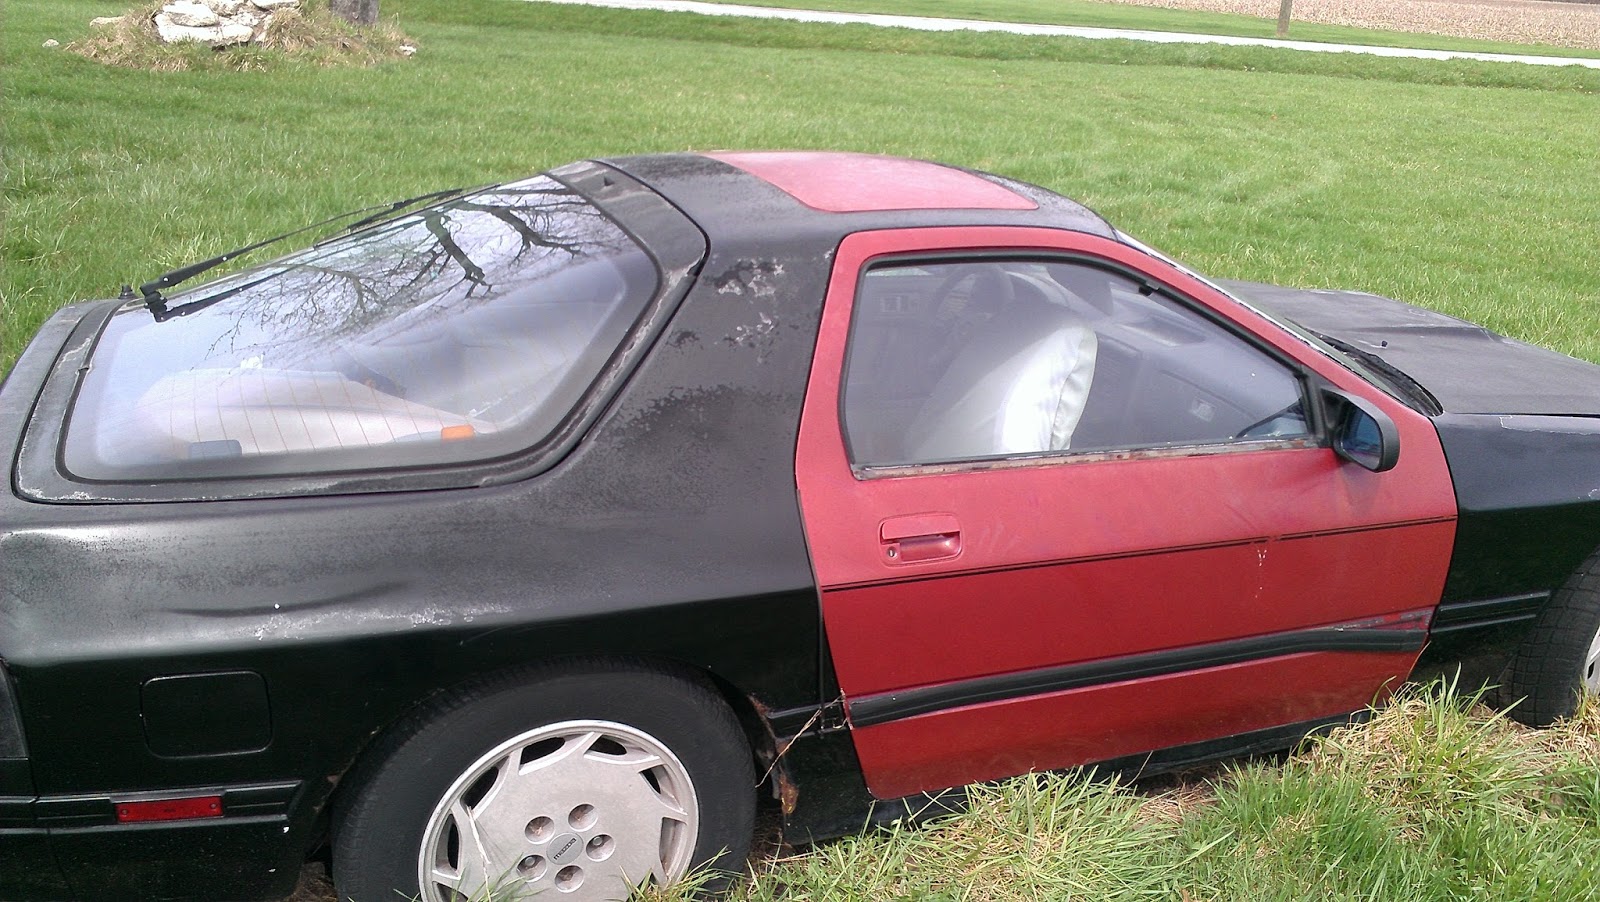
I found a donor car fairly cheap, it was set up for a V8, it came without trans or engine.
I had another car that I was going to convert, a 1987 Mazda that will be a parts car for the project.
A friend and I pulled the engine from the donor and I had the remainder towed to the house so I
could pull the transmission and any useful parts
from the car.
The shifter was damaged in the engine pull, so I
ordered a short throw shifter for the transmission.
With some searching on the EV sites, I found a
controller with hall effect pedal and water cooling unit for a good price. I originally wanted
1000 amp controller but ended up with a 1200 Amp unit.

I found some parts with the local EV club, Vacuum pump with switch, a 55A Iota DC/DC converter, main contactor, and some various pieces and tools, thanks Rob!


I struck a deal with a guy parting out his car, managed to buy batteries and charger, the batteries had some cycles on them, but pretty new so a good deal for me.
The batteries are 100AH, I really wanted to go
With 130AH, but price won the battle, I can
upgrade if needed later.

I scrounged Ebay for more parts, I purchased a
Fuse 800A and a dead front fuse holder that I am going to use for a emergency disconnect.
Also found was a light flywheel and hub for use
with the motor adaptor from Canadian EV.
I will have to machine the counterweight off the
flywheel hub to make it work.


6-12-13The work on the car continues, removal of gas tank and other items. I removed the clutch master
cylinder and the original gas pedal, fuel regulator and lines.

6-13-13
The used charger arrived today, fairly large but pretty light. I think I have all the plugs to wire it for charging, but still need to sort out the wiring.

After doing some tests with the vacuum pump I found a sticking brake caliper that will need repair, I think inspection and rebuild is in the future for all wheels.


While waiting on parts I am measuring spaces for the batteries, it looks like 30 in the back 20
 up front will work well. Weight distribution is a
factor to keep the car 50/50 balance.